
How To Use Regsvr32 To Register Or Unregister Files - (DLL - OCX - Etc)
MalwareBytes is GeekDrop's Favorite Anti-Malware Solution
Act now to get a huge savings on GeekDrop's favorite Backup, Imaging, & Drive Utilities. Also our member's #1 choice!

Manually Registering and UnRegistering Files Using RegSvr32 |
|||
|
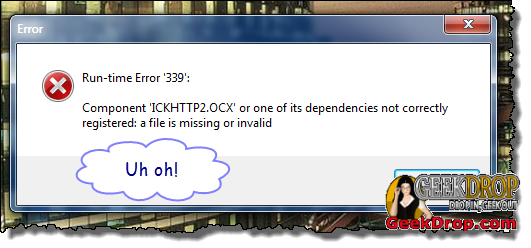
There are times when you might go to run a program, game, whatever, and you end up just getting an error message, or your might need to manually UNregister DLL's, OCX files, or other helper files. (OCX files are essentially DLL's and work the same exact way).
Manually UnRegistering files is sometimes necessary when trying to clean up after a nasty virus or Malware |
|||
|
Fig-1
 |
|||
|
The message will always contain this: "Component <name> ... or one of its dependencies not correctly registered: a file is missing or invalid" Fortunately, this is an easy fix, and we'll show you how right now. |
|||
What you'll need: |
|||
|
|||
Let's start!The first thing you'll need to do is to open a Windows Command Window. If you don't know how to do this already, we have a very simple tutorial for beginners explaining how to do it. Don't worry, there's absolutely nothing scary about it. Click here to read it. |
|||
|
|||
| Once you have a Command Window open, now comes the fun part. Making sure that your command window's path (the part before the ">" sign below) is showing it's "in" the same folder as the file(s) you're (un)registering, type in "regsvr32" (without the quotes) followed by a space, and then the full file name of the file to register, just like shown in Fig-2 below.
Then press the "Enter" button. Tip: To navigate to other folders within the command window, look toward the bottom of our short tutorial here |
|||
Fig-2 |
|||
|
After you've pressed the "Enter" key, if all went well ... you should see the following message (Fig-3) |
|||
Fig-3 |
|||
|
Congrats ! You've successfully registered a DLL (or OCX)!Now, you may want or need to do the opposite ... that is, UNregister a DLL. No worries, it's exactly the same, with ONE small difference ... as shown below (Fig-4), you'll want to add a "/u" (which stands for "unregister") between the regsvr32 command and the file name, and then press the "Enter" key. |
|||
Fig-4 |
|||
|
And just like above, if all goes well after pressing the "Enter" button, you should see this screen pop up ... (Fig-5) |
|||
Fig-5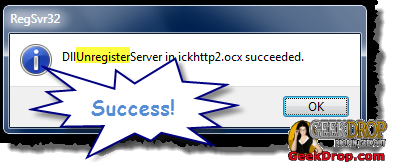 |
|||
|
You're file is now no longer registered (meaning recognized and usable) with your Windows OS. But since we're all GEEKS Just use the custom GeekDrop registry keys, written by STaRDoGG! (not even a 1kb download, downloadable at the bottom of this post). Using our registry file, you'll get two nice menu items when right-clicking on (and ONLY on) any DLL or OCX file. If you right-click on any other file type, the two items do not show up, since they aren't needed. The 2 added context menu items are: |
|||
|
|||
|
Clicking on the menu item will either register or unregister the highlighted file, depending on which item you clicked. How cool (and easy) is that? To install, simply follow these steps:
For the nervous, a .reg file is simply a text file with the proper structure and format for your Windows Registry to understand how to import the keys it contains. You're welcome to open it with a text editor, such as notepad, to view what's inside. After double-clicking on the .reg file, you'll see the following message pop up (Fig-6): |
|||
Fig-6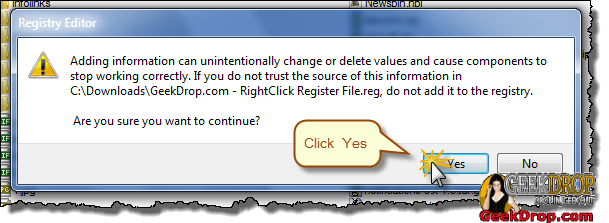 |
|||
|
Click the "Yes" button, and you'll see the following screen ... (Fig-7) |
|||
Fig-7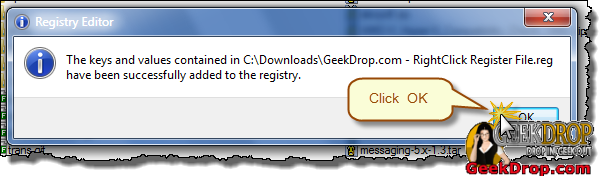 |
|||
|
Showing that the keys were successfully imported into your registry. There ya go! From now on, whenever you right-click on either a DLL file or an OCX file, you'll see the menu items as shown below (Fig-8, 9). Just click the menu item and you'll no longer need to hand type everything whenever you need to register or unregister files! As a really sweet bonus, if you highlight multiple files to register, it'll do all of them one after another! |
|||
Fig-8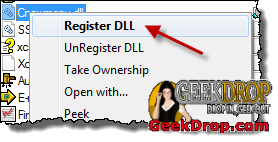 |
Fig-9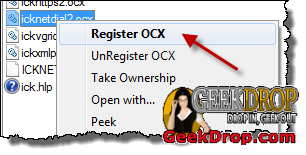 |
||
|
Be sure to join our FaceBook Fan page for other cool stuff by clicking right HERE |
|||
 here on the Drop ... let's make this process a whole lot easier. You never know how often or when you'll need to do this again, so why try and remember all of those steps, or even do them at all?

Read More ...
| Attachment | Size |
|---|---|
| GeekDrop.com-RightClickRegisterFile.zip | 333 bytes |

- 19220 reads

Who's New


Recent comments
1 year 6 weeks ago
1 year 27 weeks ago
1 year 28 weeks ago
1 year 32 weeks ago
1 year 32 weeks ago
1 year 42 weeks ago
2 years 8 weeks ago
2 years 9 weeks ago
2 years 9 weeks ago
2 years 49 weeks ago